Day 1 · Networking I — Addressing & the Tools to See It
Week 2 is Operation: Go Live — by Sunday you'll have a containerized app running behind Nginx, over HTTPS, on your own domain. Everything starts here, with the network. Today you learn how machines are addressed and how data moves — then you'll watch it move with your own eyes: chat over a raw socket, capture a live TCP handshake, and type an HTTP request by hand.
Learning Objectives
- Read an IPv4 address, identify its class, and interpret CIDR/subnet notation
- Explain the difference between private and public addresses, and how NAT bridges them
- Tell TCP and UDP apart, and describe what a port and a socket are
- Inspect your machine's interfaces, routes, and listening sockets (
ip,ss,netstat) - Test reachability and trace a path with
pingandtraceroute - See traffic for real — a raw
ncchat, atcpdumphandshake capture, and HTTP typed by hand withnc
Theory · ~20 min
1. The network as a stack of layers
You don't send bytes straight onto a wire — each layer wraps the one above it and hands it down. The TCP/IP model has four:
| Layer | Job | Examples |
|---|---|---|
| Application | The thing you actually want | HTTP, SSH, DNS |
| Transport | Deliver to the right program | TCP, UDP (ports live here) |
| Internet | Deliver to the right machine | IP (addresses live here) |
| Link | Move bits on the local wire | Ethernet, Wi-Fi (MAC addresses) |
When you curl https://example.com, your request travels down this stack on your machine and up it on the server. Almost every command today lives on one of these layers — knowing which one tells you where to look when something breaks.
📺 Watch — OSI and TCP/IP Models — Best Explanation (Drunk Engineer, ~19 min)
A clear visual walk through both models and how each layer maps to the real protocols you'll use all week.

2. IPv4 addresses
An IPv4 address is 32 bits, written as four octets (0–255) separated by dots:
Every address splits into a network part (which network you're on) and a host part (which machine on it). What divides them is the subnet mask.
IPv6 exists — and matters
We ran out of IPv4 addresses years ago; IPv6 (128 bits, e.g. 2001:db8::1) is the long-term fix. The concepts today — addressing, subnets, ports, TCP/UDP — carry straight over. We teach IPv4 because it's what you'll debug daily on servers and in cloud VPCs.
3. Address classes (the historical map)
Originally IPv4 was carved into classes by the first octet. You'll still hear the terms, and they explain why the private ranges look the way they do:
| Class | First octet | Default network size | Typical use |
|---|---|---|---|
| A | 1–126 | /8 — 16M hosts | Huge networks |
| B | 128–191 | /16 — 65K hosts | Medium networks |
| C | 192–223 | /24 — 254 hosts | Small networks |
| D | 224–239 | — (not host-addressed) | Multicast — one sender to many subscribers (streaming, routing protocols like OSPF) |
| E | 240–255 | — (reserved) | Experimental / reserved — not for normal use |
Classes A–C were for ordinary host addressing; D and E are special-purpose and never assigned to individual machines. (127.x sits between A and B as the reserved loopback range — which is why Class A stops at 126.)
Classes were wasteful (a class A handed out 16 million addresses to one org), so the internet moved to CIDR — flexible, class-free sizing.
4. CIDR & subnets
CIDR (Classless Inter-Domain Routing) writes the network size as a prefix length after a slash — the number of leading bits that are the network part:
| CIDR | Network bits | Addresses | Usable hosts* |
|---|---|---|---|
/24 |
24 | 256 | 254 |
/16 |
16 | 65,536 | 65,534 |
/8 |
8 | 16,777,216 | 16,777,214 |
/32 |
32 | 1 | 1 (a single host) |
* Two addresses in every subnet are reserved: the network address (all host bits 0, e.g. .0) and the broadcast address (all host bits 1, e.g. .255).
Higher prefix = smaller network
/24 is smaller than /16. More network bits fixed → fewer bits left for hosts. /32 is a single machine — you'll see it constantly in firewall and routing rules.
📺 Watch — What is Subnetting? — Subnetting Mastery, Part 1 of 7 (Practical Networking, ~9 min)
The clearest subnetting series on YouTube — Part 1 builds the intuition behind CIDR and subnet math before you do it by hand in the lab.
5. Private networks & NAT
Some ranges are reserved as private — routers never forward them across the public internet, so everyone can reuse them at home and inside data centers (RFC 1918):
| Range | CIDR | Where you'll see it |
|---|---|---|
10.0.0.0 – 10.255.255.255 |
10.0.0.0/8 |
AWS VPCs, big corporate nets |
172.16.0.0 – 172.31.255.255 |
172.16.0.0/12 |
Docker's default bridge |
192.168.0.0 – 192.168.255.255 |
192.168.0.0/16 |
Home routers, your Vagrant VM |
So how does a machine with a private IP reach the public internet? NAT (Network Address Translation). Your router has one public IP; it rewrites the source address of outgoing packets to its own, remembers the mapping, and translates replies back:
Your VM 192.168.56.10  ──▶  Router (NAT)  ──▶  Internet
        (private)            swaps in its         (sees only the
                             public IP            router's public IP)
127.0.0.1 (localhost) is special — it always means this machine and never leaves it.
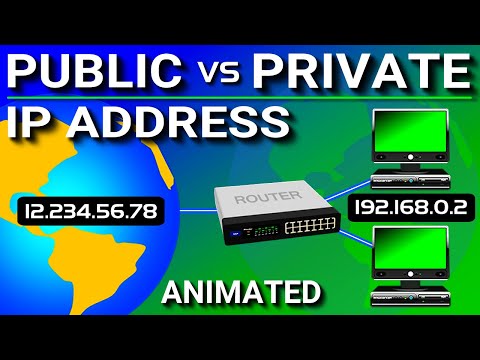
📺 Watch — Public vs Private IP Address (PowerCert, ~7 min)
A quick animated explainer of the private RFC 1918 ranges and how NAT gets a private machine onto the public internet.
6. Ports & sockets
An IP address gets a packet to the right machine; a port gets it to the right program on that machine. A port is a 16-bit number (0–65535). An IP address plus a port is a socket — the full "apartment number" for a connection:
| Port | Service | Port | Service | |
|---|---|---|---|---|
| 22 | SSH | 443 | HTTPS | |
| 25 | SMTP (mail) | 3306 | MySQL | |
| 53 | DNS | 5432 | PostgreSQL | |
| 80 | HTTP | 6379 | Redis |
Ports 1–1023 are well-known and require root to bind. Ports 1024–65535 are for everything else.
7. TCP vs UDP
Both live at the transport layer; they make opposite trade-offs:
| TCP | UDP | |
|---|---|---|
| Connection | Yes — a handshake first | No — just fire packets |
| Reliability | Guaranteed, in order | Best-effort, may drop/reorder |
| Overhead | Higher | Lower |
| Good for | HTTP, SSH, databases | DNS, video, games, VoIP |
TCP opens with a three-way handshake — you'll capture this exact exchange in the lab:
Client ──  SYN  ──▶ Server     "let's talk?"
Client ◀ SYN-ACK ── Server     "sure, you too?"
Client ──  ACK  ──▶ Server     "yep — connected"
📺 Watch — TCP vs UDP Comparison (PowerCert, ~5 min)
The two transport protocols side by side, animated — reliability vs speed, and when each wins.
Lab · ~50 min
Work inside your Vagrant VM (vagrant ssh). First, install today's toolkit — most of these aren't in the base image:
Step 1 — Look at your own addresses
ip addr show                 # every interface and its IP(s)
ip -brief addr               # one tidy line per interface
hostname -I                  # just this host's IP(s)
Find your interfaces. You'll typically see:
lo— loopback,127.0.0.1(always present, never leaves the box)- an interface with a
10.xaddress — Vagrant's NAT interface (your route to the internet) - an interface with
192.168.56.10— the private network you set in theVagrantfile
Step 2 — Where do packets go? The routing table
ip route show                # your routes; the 'default' line is your gateway
ip route get 8.8.8.8         # which interface + gateway a packet to 8.8.8.8 would use
The default route is where anything not on your local network is sent — your gateway to everything else.
Step 3 — Subnet math, made concrete
ipcalc does the binary arithmetic for you:
ipcalc 192.168.1.10/24       # network, broadcast, host range, number of hosts
ipcalc 10.0.0.0/8
ipcalc 192.168.56.10/24      # your VM's private network
Read off, for 192.168.1.10/24: the network is 192.168.1.0, broadcast is 192.168.1.255, and usable hosts run .1–.254.
Step 4 — Who's listening on this machine?
ss -tlnp                     # TCP, Listening, Numeric ports, Process — the modern tool
sudo ss -tlnp                # add sudo to see process names you don't own

# The classic equivalent (from net-tools) — same idea, older tool:
netstat -tlnp
Flag reference: -t TCP · -u UDP · -l listening only · -n numeric (don't resolve names) · -p show the process. You'll almost certainly see sshd on port 22.
ss vs netstat
netstat is the tool everyone knew for decades; ss ("socket statistics") replaced it — it's faster and the default on modern distros. Learn ss, but recognize netstat because you'll meet it on older servers and in old blog posts.
Step 5 — Is it reachable? What's the path?
ping -c 4 8.8.8.8            # 4 packets to Google DNS — pure reachability
ping -c 4 google.com        # also proves DNS resolves the name (tomorrow's topic)

traceroute 8.8.8.8          # every hop (router) between you and the destination
The first hop in traceroute is your gateway — the same address as the default route from Step 2.
Step 6 — Talk to any service with nc
nc (netcat) reads and writes raw data over a TCP (or UDP) connection. It can listen on a port (act as a server) or connect to one (act as a client) — whatever you type crosses the wire, and whatever comes back prints to your screen. That two-sidedness is why it's called the "TCP swiss-army knife."
Chat across a raw socket. Open two terminals into the VM (vagrant ssh in each) — one listens, one connects:
Type in either terminal and press Enter — the text appears in the other. You just built a chat app out of one TCP connection, no application involved. Ctrl-C to end.
Be the browser. A protocol like HTTP is just text, so nc can speak it by hand — here it acts as the client, fetching a page:
The server at example.com replies with the raw HTTP headers and HTML a browser normally hides.
nc mini-cookbook — same idea, more tricks
Every line is just "connect two ends and move bytes."
# TCP chat  →  A: nc -l 9000        B: nc 127.0.0.1 9000
# UDP chat  →  A: nc -ul 9000       B: nc -u 127.0.0.1 9000   (client must type first)

# Is a port open?   nc -zv example.com 443     # -z scan only, -v verbose
# Send a file:      A: nc -l 9000 < photo.jpg      B: nc 127.0.0.1 9000 > photo.jpg

# Serve a static HTML page as a one-shot web server, then curl it:
echo '<h1>Hello from nc</h1>' > index.html
{ printf 'HTTP/1.1 200 OK\r\nContent-Type: text/html\r\n\r\n'; cat index.html; } | nc -l 8080
#   in another terminal:  curl http://localhost:8080
nc handles one connection then exits — wrap the web-server line in while true; do …; done to keep it up.
nc sends everything in plaintext
Whatever you type over nc — secrets included — crosses the network unencrypted, readable by anyone watching (you saw a live packet in Step 7). Fine for learning protocols by hand, but it's exactly why you never log into a real server this way — and why Day 3 replaces it with encrypted SSH.
You'll still see telnet in the wild
Older tutorials hand-type HTTP or SMTP with the classic telnet client instead of nc — same idea, and just as plaintext. Recognize it, but reach for nc (which also listens, does UDP, and transfers files):
telnet example.com 80
# then type:  GET / HTTP/1.1  ⏎  Host: example.com  ⏎  ⏎   (blank line ends the request)
telnet isn't installed by default here (sudo apt install -y telnet if you want to try it) — we standardize on nc.
Step 7 — Watch the TCP handshake with tcpdump
Now see the three-way handshake from the theory. In Terminal A, start capturing loopback traffic on port 9000:
Then trigger some traffic using the nc chat from Step 6 — start the listener (nc -l 9000) and connect to it (nc 127.0.0.1 9000) in two other terminals. Watch Terminal A: you'll see the full handshake — S (SYN) → S. (SYN-ACK) → . (ACK) — fly by, followed by your chat messages. Ctrl-C to stop the capture.
tcpdump is your ground truth
When two services 'can't talk' and everyone's guessing, tcpdump shows you exactly which packets arrive and which don't. -i picks the interface, -n skips name lookups, and the final quoted part is a filter.
Reading a tcpdump line. Each line is one packet. A SYN from the handshake reads like this:
14:23:45.671 IP 127.0.0.1.51512 > 127.0.0.1.9000: Flags [S], seq 872…, win 65495, length 0
└── time ──┘ ▲  └──── source ───┘ ▲ └─ destination ┘ └flags┘  └── seq / window ──┘  └payload┘
             │                    └ "to"
             └ IPv4      (each endpoint is IP.PORT — the LAST number is the port)
| Piece | Meaning |
|---|---|
14:23:45.671 |
timestamp |
127.0.0.1.51512 > |
source IP + port, > means "to" |
127.0.0.1.9000 |
destination IP + port |
Flags [S] |
the TCP flags (below) |
seq / ack / win |
sequence & acknowledgement numbers, window size |
length 0 |
payload bytes — 0 = a control packet with no data |
The flags tell the whole story of a connection:
| Symbol | Flag | Means |
|---|---|---|
[S] |
SYN | open a connection |
[S.] |
SYN-ACK | the other side agrees |
[.] |
ACK | acknowledged |
[P.] |
PSH-ACK | carries real data |
[F.] |
FIN | close politely |
[R] |
RST | reset — refused or torn down |
Five captures worth memorizing
sudo tcpdump -i any -n -c 20                        # 1. grab 20 packets, then stop  (-c count)
sudo tcpdump -i any -n host 1.1.1.1 and port 443    # 2. filter to one host + port
sudo tcpdump -i any -nA -c 10 'tcp port 80'         # 3. show payload as TEXT (-A) — read HTTP live
sudo tcpdump -i any -w /tmp/cap.pcap 'udp port 53'  # 4. save raw packets to a file (-w)  [Ctrl-C to stop]
tcpdump -r /tmp/cap.pcap -n                         # 5. read a saved capture back (-r)
-c caps the count so a busy link doesn't flood your screen; -A prints ASCII so you can read plaintext protocols; -w writes a .pcap you reopen with -r here or in Wireshark.
Advanced Topics
You've got the working model. These are the next rungs — read the linked resource for each:
- The OSI 7-layer model — the academic cousin of TCP/IP, and the source of "layer 3 / layer 7" jargon → Cloudflare — OSI model
- How you get an address automatically — DHCP and ARP, the link-layer machinery beneath IP → Cloudflare — What is DHCP?
- Subnetting by hand — split a network into smaller ones without a calculator → Practical subnetting guide
- Wireshark — tcpdump with a GUI; capture on the VM, open the
.pcapon your host → wireshark.org
Assignment
-
Map a network you don't control. Pick any public host you use (e.g.
github.comor your school's site). Using only today's tools, produce a short report: its IP address (pingordig +short), how many hops away it is (traceroute), and whether port 443 is reachable (nc -zv HOST 443—-zjust scans,-vis verbose). Paste each command and its output, and say which TCP/IP layer each command operated at. -
Subnet design. Your team is handed the block
10.20.0.0/16and told to split it so each project team gets its own/24. Answer, showing your reasoning: How many/24subnets fit inside a/16? For the third subnet, what are its network address, broadcast address, and usable host range? Verify your answer withipcalc.
Further Reading
Watch
- OSI and TCP/IP Models — Best Explanation (Drunk Engineer) — both models and how the layers map to real protocols
- What is Subnetting? — Subnetting Mastery (7-part series) (Practical Networking) — go from zero to fluent at subnet math
- Public vs Private IP Address (PowerCert) — RFC 1918 ranges and NAT
- TCP vs UDP Comparison (PowerCert) — reliability vs speed, animated
Reference
- Cloudflare Learning — What is TCP/IP? — clear, illustrated fundamentals
- Julia Evans — networking zines — the friendliest explanations of ports, packets, and DNS anywhere
- tcpdump: an illustrated zine (wizardzines) — a friendly deep-dive on reading captures
- subnet-calculator.com — check your CIDR math
man ss,man ip,man tcpdump,man nc